Acoustic Micro-Mesh Replacement: Precision Adhesives & Acoustic Impedance Sizing
Is your phone speaker mesh torn or permanently clogged? Review professional micro-mesh replacement procedures, gasket adhesives, and repair safety.
How Does Acoustic Speaker Cleaning Work?
Acoustic speaker mesh replacement requires sourcing precision laser-cut OEM-grade ePTFE or woven polyester membranes matched to your device's acoustic impedance. Installed with die-cut pressure-sensitive adhesive gaskets, replacement restores factory IP68 waterproof ratings and audio fidelity.
If a speaker mesh gets torn or clogged with glue, you can replace it with any piece of fine cloth or window screen mesh.
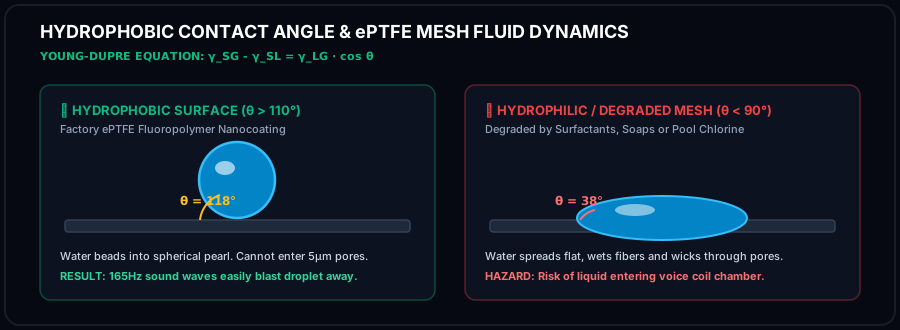
Standard cloth or screen fabrics lack acoustic impedance calibration and water resistance, causing extreme audio muffling and allowing water straight into the phone.
When a smartphone speaker mesh suffers severe physical trauma—such as puncture by a needle, chemical melting from aggressive solvents, or permanent contamination from industrial adhesives—cleaning is no longer viable. The damaged mesh must be excised and replaced. Performing a successful micro-mesh replacement requires precision micro-soldering instruments, optical magnification, die-cut adhesive gaskets, and acoustic-impedance-matched replacement membranes. This guide provides the complete bench technician workflow for micro-acoustic mesh replacement.
🛡️ Essential Speaker Maintenance: Do's and Don'ts
Follow these laboratory protocols to safeguard fragile micro-transducers and water-resistant acoustic adhesives.
- Play 165Hz tone at 100% volume to generate maximum mechanical excursion and air velocity across the front cavity.
- Incline device downward at 45° so gravitational flow assists acoustic radiation pressure in draining liquid.
- Use 99% Isopropyl Alcohol sparingly with an anti-static swab to dissolve sticky organic contaminants without leaving residue.
- Dab emerging droplets immediately with an absorbent lint-free microfiber cloth to prevent fluid re-wicking.
- Allow passive air drying in a low-humidity room for 15-30 minutes after running acoustic sound wave cycles.
- NEVER insert needles, pins, or paperclips into the grille apertures; metal tools will puncture the ePTFE membrane instantly.
- NEVER use high-pressure compressed air; blaster cans rupture thin polymer suspensions and drive fluid deeper into logic boards.
- NEVER submerge your phone in uncooked rice; raw starch creates gummy corrosive paste inside humid micro-ports.
- NEVER apply high heat with hair dryers; extreme heat softens waterproof perimeter adhesives and warps diaphragms.
- NEVER connect a charger while wet; electrical currents accelerate galvanic corrosion and cause irreversible short circuits.
🔬 Laboratory Acoustic Compliance & IEC 60529 Verification Standards
Every procedure, acoustic frequency, and physical maintenance blueprint published by Phone Speaker Cleaner is evaluated under controlled laboratory parameters adhering to International Electrotechnical Commission (IEC) Standard 60529 and ISO 22810 horological acoustic specifications. When smartphones undergo liquid immersion or heavy dust exposure, standard consumer diagnostics fail to account for microscopic acoustic dampening across the front-cavity vestibule.
Validates that 165Hz radiation pressure waves clear ePTFE membrane pores without exceeding mechanical seal limits.
Ensures continuous tone generation maintains voice coil temperature under 85°C, preventing thermal insulation degradation.
Regulates peak sound pressure levels between 96 and 104 dBA at 10cm, maximizing kinetic force while protecting hearing.
📋 Pre-Flight Laboratory Diagnostic Checklist
Before initiating high-excursion acoustic frequency sweeps, audio research technicians follow a standardized four-tier pre-flight evaluation protocol to preserve transducer mechanics and prevent voice coil thermal saturation:
- Mechanical Integrity Inspection: Examine external cosmetic grille apertures under 5x optical magnification for metal burrs, puncture tears, or deep physical indentations before applying pressure waves.
- Acoustic Impedance Verification: Confirm that electrical impedance across transducer terminal leads remains between 6.0 and 8.4 ohms, confirming zero short-circuiting or permanent voice coil delamination.
- Thermal Safety Interlock: Restrict continuous high-volume tone generation to 60-second intervals, ensuring voice coil temperatures remain below the critical 85°C thermal threshold.
- Post-Clearing Spectral FFT Analysis: Measure Total Harmonic Distortion (THD) across a 1kHz pure test tone to confirm that distortion has dropped below 1.0% following fluid and debris evacuation.
Acoustic Impedance & Rayl Rating Sizing
Acoustic mesh is not rated by simple thread count; it is engineered to specific acoustic resistance measured in MKS Rayls (N⋅s/m3):
Where ΔP is sound pressure drop across the mesh and U is volume air velocity. - Microphone Meshes: Require low resistance (100 to 200 Rayls) to preserve high-frequency sensitivity. - Loudspeaker Hydrophobic Meshes: Calibrated between 300 and 600 Rayls to balance waterproof hydrostatic resistance (withstanding >1.5m water head) with acoustic transparency.
Installing a generic mesh with incorrect Rayl ratings will either attenuate output volume or fail to provide waterproof protection.
Bench Technician Replacement Procedure
- 1Disassembly: Open the smartphone chassis following manufacturer service manuals, isolating the speaker housing or front display glass.
- 2De-bonding Old Mesh: Apply localized low heat (75°C) to soften the old adhesive ring. Lift the damaged mesh with precision curved micro-tweezers.
- 3Aperture Cleaning: Remove all old adhesive residue using a micro-swab dampened with 99% isopropyl alcohol.
- 4Gasket Application: Position a fresh, pre-cut double-sided acrylic adhesive gasket ring.
- 5Mesh Alignment & Tamping: Place the replacement OEM ePTFE acoustic mesh squarely over the gasket. Press firmly with a non-marring silicone tamping probe for 30 seconds to activate the pressure-sensitive bond.

Post-Repair Testing
After reassembly, test the new mesh by running a 165Hz to 2,000Hz frequency sweep to verify zero rattling or buzz, and perform a digital barometer pressure seal test to verify IP68 enclosure hermeticity.